
Tools & Materials Required
- Shovel
- Pipe Cutter or Hack Saw
- PVC Glue
- Various sized fittings, PVC pipe, replacement heads, or nozzles
- Volt Meter
- Wire Nuts / Wire Stripper
- Flags or Some Sort of Marker
Inspect Irrigation System (Step 1)
To check for broken heads or pipes we need to turn the sprinkler system on, if your system is working you can skip this step. If your system or certain zones aren’t working, start here.
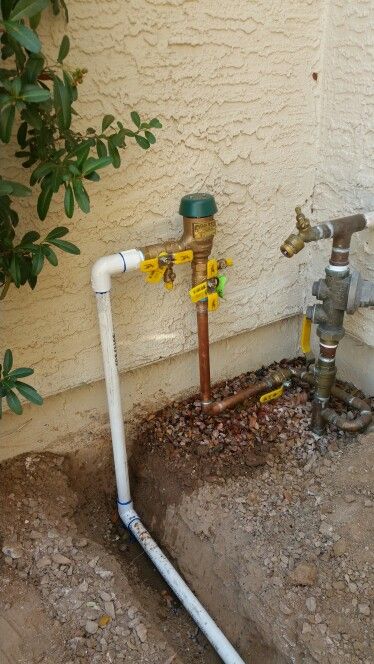

Listed above from left to right:
1. Pressure Vacuum Breaker / Back Flow – Main water source, stops contaminated water from entering home.
2. Irrigation Timer / Controller – Sends signal to irrigation zones to turn on
3. Irrigation Valve / Zone – Receives signal from timer to allow water into each zone
The first place to look when inspecting your irrigation system is the back flow prevention valve, this valve connects to your water main and is the source of your irrigation water.
This valve stops the water going to your irrigation system from entering your home or going back to the mainline. The correct term for it is pressure vacuum breaker. In Florida the code stipulates this must be installed using schedule 40 1″ PVC at a minimum. If your system runs on a well/pump you may not have one of these.
Check to make sure both valves are open (handles in line with the pipe, parallel to it)
Some reasons this may be closed, the pipe was damaged by a weed eater or the system was shut off for the winter. In Florida we don’t typically winterize irrigation systems so if this is off it may be damaged. Over time this valve will wear internally and may need to be replaced.
As this valve is connected directly to your water main it should only be repaired or replaced by a licensed and insured irrigation service provider.
Once you have verified the back flow is on and not damaged, the next step would be to run the system manually from the irrigation timer. Pictured above is a Rainbird ESP-8 which is a common sprinkler system controller. Hunter is another common irrigation timer brand.
Each irrigation timer / controller will have its own way to run manually- refer to your manual or an internet search. If your system starts watering you can skip the next step!
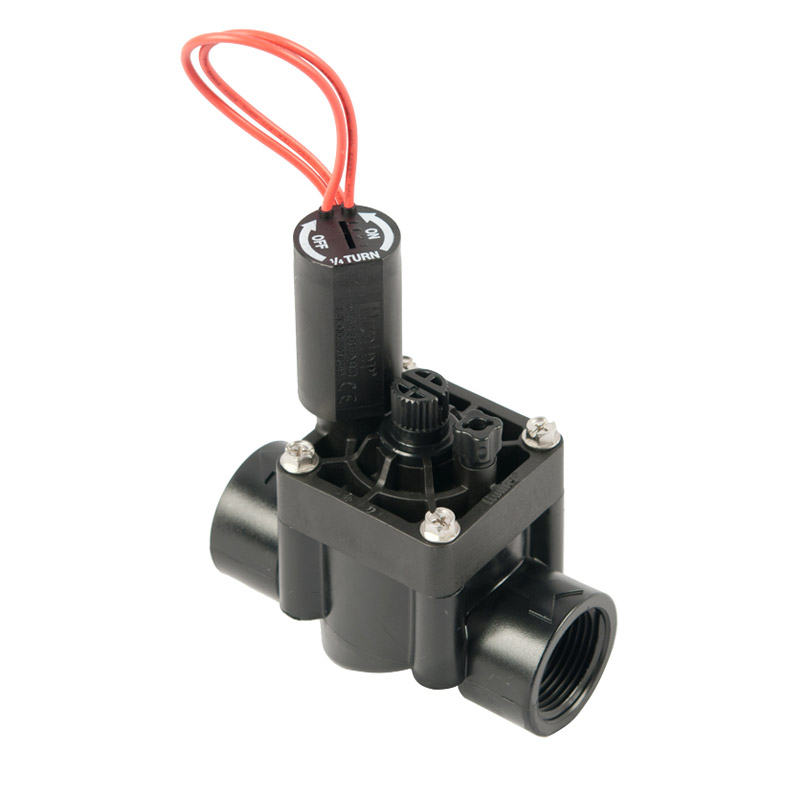
If your system still isn’t working after checking the back-flow prevention valve and running the timer, it’s time to open the valves manually! The valves for each zone should be located near your back flow, they are usually in a box underground. A valve can be actuated manually by unscrewing the solenoid (part with wires) or the bleeder screw if equipped. Only loosen 1/4 to 1/2 turn, you do not want to completely remove either of these parts as they are under pressure.
Now is the moment of truth, if a zone does not come on you most likely have no water. If a zone comes on manually at the valve but not at the timer you have an electrical problem, either a damaged timer, solenoid, or wiring. If a zone comes on and stays on after turning it off- you have a damaged diaphragm or an obstruction in the line. If you’re a little more technically advanced we will go over electronic troubleshooting at the end of this article.
Flag or Mark Problem Areas (Step 2)

Start each irrigation zone and walk around the lawn to inspect them, look for things like pools of water, low pressure, broken heads, or incorrectly aimed sprinklers. The average home has around 40-60 psi of water pressure, if a zone has correct pressure it should be very difficult to push a pop-up sprinkler head down while it’s running. If your heads are very low, or bouncing up and down you have a pressure issue caused by a line break, weak pump, or damaged head.
If you have low pressure but don’t see any leaks let the zone run for 10-15 minutes, if you have a line break it will be very hard to miss. (Keep in mind a single broken sprinkler head wastes around 750 gallons of water in one hour). Look closely at the spray patterns to be sure you have end to end coverage- meaning each sprinklers stream touches the nearest sprinkler to it. Mark or flag any parts of the system that need repair.
Repair Broken Sprinklers or Lines (Step 3)
ALWAYS have utilities marked by your local provider before digging (in Florida we call 811) this is usually free! Losing your cable is ok but if you hit a power line it could be a real bummer.
All systems are designed and installed differently based on each property and its watering needs, so your pipes could be 1/2″ or 3/4″ or 1″ the list goes on. Almost all heads however are 1/2″ or 3/4″ female thread depending on if they are a spray head or a rotor. Make sure your system is off before digging or making repairs. We like to go a step further and bleed any water from a zone manually at the valve beforehand. (It’s a lot easier when your workspace doesn’t fill up with water)
Remove spray nozzles from heads and check for damage or clogged filters. (The spray pattern of a sprinkler is not adjusted by tightening or loosening the nozzle) to aim a sprinkler firmly hold the base/body while rotating the riser left or right – there should be an audible click. Hunter makes adjustable nozzles from 0-360 degrees.
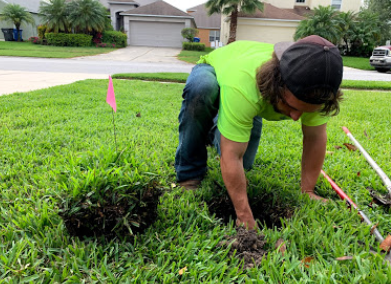
To replace a broken sprinkler head, dig around it carefully as not to break the pipe. Once the pipe is exposed unscrew it and replace it with a similar type and height. (it’s against code to install a rotor and a spray head on the same zone) Most new sprinklers won’t come with a nozzle installed, they will have a removable purge in order to clean the lines of debris before installing your new nozzle. Different nozzles have different patterns and distances be sure to carefully select your nozzles based on your needs.
If a sprinkler or line is broken in a high traffic area, such as near a driveway or a sidewalk you may want to consider replacing the line with a flex line instead of a rigid pipe (this can help mitigate future damage) If you’ve never used PVC glue before, it can burn your hands so a good pair of gloves might be helpful, you also want to make sure you aren’t inhaling too much of it- unless you’re into that sort of thing. Another thing to keep in mind is that you need at least 30 degrees of flex in order to install a coupling/union on a pipe, if you can’t dig a few feet in each direction you may want to purchase what is known as a slip-fix from your local hardware store
Advanced Irrigation Troubleshooting

If you are here, there’s a possibility you have been unable to run your system at all. A few things could cause this such as a damaged well pump, a water outage, a damaged irrigation timer, or not being able to locate your valves. Other problems you may have could be a tree root constricting your irrigation lines, recent construction or pool installation and much more (you may want to consider hiring a pro)
In this section we will run through some electronic irrigation troubleshooting you can do on your own if you’re comfortable with it.
Your irrigation system is divided into a series of zones.
If you have a zone that’s not working, you may have an electrical problem.
Make sure the zone wires are firmly attached to the lugs/terminals in the controller, the transformer is plugged in, and the circuit breaker is on.
Test for voltage to the nonworking zone, using a multi-meter.
Turn on the nonworking zone at the controller.
Turn the multi-meter dial to voltage and place one probe on the common terminal.
(The common terminal will be marked “c” or “com”)
Place the other lead on the terminal of the zone that’s not working.
Refer to your owner’s manual to see whether the voltage reading falls within the required range (usually 24 to 28 volts). If it doesn’t, the controller needs to be replaced.
Once the timer has been tested, if it appears to be functional, you either have damaged wiring to the valves or a damaged solenoid, you can test voltage at each solenoid in your valve box to confirm this. When replacing a solenoid always be sure to used watertight connectors.
BONUS: An incorrectly installed or malfunctioning rain sensor can cause your system to be inoperable
Conclusion
Broken sprinkler systems can be caused by three main factors: Mechanical, Electronic, and Natural.
Brown patterns in the lawn or high water bills are a good indicator of a poor or broken irrigation system. Sometimes the repairs are very simple and other times they are much more complex.
Care should be taken to select the proper pattern, arc, distance, height, and flow needed for each system. These factors are controlled by pipe size, sprinkler type, nozzles, and regulators.
When hiring a company to inspect or repair your irrigation system be sure they are competent, licensed, and insured. Whether your irrigation timer keeps blowing a fuse, you just had a pool installed, an irrigation zone won’t come on, or you have a broken sprinkler – we’ve seen it all.
We are Hunter certified product technicians and would love to repair your system, we offer reasonable inspection pricing and yearly maintenance plans as well!
If you need any help with your system feel free to email or give us a call at (813) 586-4256 (HALO)
